How to add signature in pdf into ppt, how to add signature in pdf into png, how to add signature in pdf instalar, how to add signature in pdf foxit, how to add signature in word, how to add signature in adobe, how to add signature in outlook, how to add shortcut to chrome homepage, how to add page numbers in word, how to get free robux,
If you're looking for a safe and secure way to authenticate PDF documents, digital signatures are your go-to solution. Fortunately, with Microsoft Edge, you can now enable and validate these signatures with ease. In this article, we'll guide you through the process of enabling digital signatures in Microsoft Edge. So, let's dive in!
What are Digital Signatures?
Before we dive into enabling digital signatures in Microsoft Edge, it's important to understand what they are. Put simply, a digital signature is a cryptographic technique that works to verify the authenticity and integrity of a digital document. By signing a PDF file using a digital signature, you are essentially putting your seal of approval on the document and certifying that it hasn't been tampered with. This makes digital signatures an essential tool for businesses, legal firms, and individuals who work with sensitive documents.
Enabling Digital Signatures in Microsoft Edge
Now that we've established how important digital signatures can be, let's take a look at how you can enable and validate them in Microsoft Edge. The process is relatively straightforward, so you shouldn't have any trouble following along.
Step 1: Open the PDF File in Microsoft Edge
The first step in enabling digital signatures in Microsoft Edge is to open the PDF file you want to sign. To do this, simply right-click on the PDF file and select "Open with" from the context menu. Then, choose Microsoft Edge from the list of available apps.
Step 2: Save the PDF File
Once you've opened the PDF file in Microsoft Edge, you'll need to save it to your computer. This step is necessary because digital signatures can only be added to saved PDF files. To save the PDF file, click on the "Save" button in the top-right corner of the window and give it a suitable file name.
Step 3: Enable Signatures in Microsoft Edge
Now that you have the PDF file saved, it's time to enable digital signatures in Microsoft Edge. To do this, click on the "File" menu in the top-left corner of the window and select "Options" from the dropdown menu. Then, select "Security" from the left-hand menu and tick the box next to "Enable digital signatures...".
Step 4: Add a Signature to the PDF File
With digital signatures enabled, you can now add a signature to your PDF file. To do this, click on the "Sign" button in the top-right corner of the window. Then, select "Add Signature" from the dropdown menu and follow the on-screen instructions to create your signature. Once you're happy with your signature, click on "Save Signature" to save it for future use.
Step 5: Validate the Digital Signature
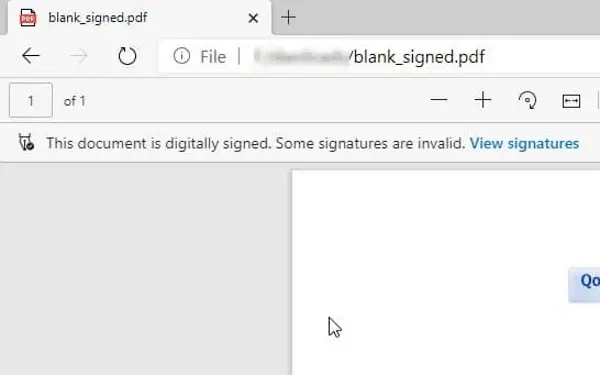
Now that you've added your digital signature to the PDF file, it's time to validate it to ensure that the document hasn't been tampered with. To do this, simply click on the "Validate Signature" button in the top-right corner of the window. Microsoft Edge will then check the signature against its database of trusted digital certificates and verify that the document is authentic.
Conclusion
Enabling and validating digital signatures in Microsoft Edge is a straightforward process that can help you to authenticate your PDF documents with ease. By following the steps above, you can ensure that your documents are secure and that your signatures are legally binding. So, go ahead and enable digital signatures in Microsoft Edge today!
Also read:
.Popular Posts
-
Yandere simulator minecraft texture pack, how to texture yandere simulator, yandere simulator wiki texture storage, yandere simulator clothe...
-
 Soalan plot novel di sebalik dinara sinopsis soalan plot novel di sebalik dinara tema soalan plot novel di sebalik dinara persoalan soalan p...
 -
Debuts 5g dual screen android phone with biggest, debuts 5g dual screen android phone, debuts 5g dual screen android, debuts 5g dual screen ...


